
| 일 | 월 | 화 | 수 | 목 | 금 | 토 |
|---|---|---|---|---|---|---|
| 1 | 2 | 3 | 4 | 5 | 6 | 7 |
| 8 | 9 | 10 | 11 | 12 | 13 | 14 |
| 15 | 16 | 17 | 18 | 19 | 20 | 21 |
| 22 | 23 | 24 | 25 | 26 | 27 | 28 |
| 29 | 30 |
- 애플워치7
- 글쓰는법
- 스타링크
- 통신3사
- 리액트
- 대학인생
- #대화
- 이대남
- 스마트워치
- parse
- 익셉션
- 팜피 주식회사
- GSON
- 꼬북좌
- 이력서는 PDF로
- 언박싱
- Rekognition
- 라때는
- Exception Safety
- react-redux
- RDS
- Firebase
- 안드로이드오토
- 브레이브걸스
- AWS
- 스타링크 국내진출
- #개발
- 파이어베이스
- 개발자 이력서
- 대기업갑질
- Today
- Total
kwondroid의 개발 세계
리액트 리덕스 쉽게 이해하기 본문
며칠째 리덕스를 이해해보려 노력하고있다.
리덕스의 개념, 쓰는 이유도 이해가 됐다. 그런데 코드로 이해하기가 너무 어렵다.
그래서 며칠동안 리덕스에 대해서만 공부하고 중간중간 너무 어려워서 Mobx, recoiljs로 공부할까 생각도 했다.
그러나 그건 도망가는것 같아서 리덕스를 공부했다. 실제로 이해를 하고 보니 생각보다 엄청 어렵지는 않다.
아직은 완전 자유롭게 쓰지는 못하겠다. 그래서 좀 익숙해지고 난 후, 리덕스를 나의 버전으로 쓰는걸 다시 한번 올려보도록 하겠다.
redux나 flux에 대해 설명은 넘기겠다. 그리고 기본 개념에 대해 설명은 하지 않고 코드 패턴을 파악하는데 포커스를 둘것이라 매우 불친절한 글이 될것이다.
그 이유는 당신은 이미 그 개념들을 보고 개념 자체는 이해가 됐지만 리덕스의 코딩 패턴이 이해가 잘 안돼서 이 글을 보고있는 것이기 때문이기 때문이다. 그래서 일단 포스팅한 뒤에 추후 이 글을 Annotated 하는 또다른 글을 포스팅하겠다.
프로젝트 시작은 'yarn global add create-react-app'의 기본 파일 구성으로 시작한다.
이 카운터 앱은 벨로퍼트님의 강의를 참고하여 만들었다.
우리가 리덕스를 이해하기 위해 만들어볼 앱은 국민앱 '카운터'앱이다.
증가, 감소 버튼을 누르면 숫자는 증감하고 배경색깔 버튼을 누르면 지금 화면에 나와있는 회색 구역의 색깔이 랜덤하게 바뀐다.
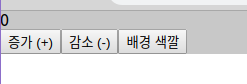
이것은 다른 컴포넌트 두개를 모아놓은 구성이다.
윗줄의 숫자는 CounterNumber, 아랫줄의 버튼들은 CounterButton 이라는 jsx 파일을 만들었고 이 둘을 Counter라는 파일로 합쳤다. 그리고 App.js에 <Counter />로 출력을 하게 했다.
CounterButton.js
import React from 'react';

const CounterButton = ({ plus, minus, background }) => {
    return (
        <div>
            <button onClick={plus}>증가 (+)</button>
            <button onClick={minus}>감소 (-)</button>
            <button onClick={background}>배경 색깔</button>
        </div>
    );
};

export default CounterButton;
CounterButton.js
import React from 'react';

const CounterNumber = ({number}) => {

    return (<div>{number}</div>);
};

export default CounterNumber
Counter.js
import React, { Component } from 'react';
import CounterButton from './CounterButton';
import CounterNumber from './CounterNumber';


class Counter extends Component {

    constructor(props) {
        super(props);
    }

	render() {
		return (
            <div>
                <CounterNumber/>
                <CounterButton />
            </div>
        );
    }
}
App.js
import React from 'react';
import Counter from './component/Counter';

function App() {
    return (
        <div>
            <Counter />
        </div>
    );
}

export default App;
파일을 이렇게 분리해놓은 이유는 리덕스 사용 방법을 알기 위함이다.
뷰 자체는 굉장히 단순하다. 그러나 만들어야할 동작은 단순하지가 않다.
1. 증가, 감소 버튼들을 누르면 다른 뷰인 CounterNumber 안의 {number}를 증감시켜줘야한다.
2. 배경 색깔 버튼을 누르면 다른 뷰인 Counter의 background를 변경해줘야 한다.
자! 그럼 코드를 어떻게 짜야하냐??
- Component 제작
- Action 제작
- Reducer 제작
- 리덕스 - 컴포넌트 연결
이 순으로 하면 된다. 컴포넌트 제작은 위에서 이미 끝냈다.
그럼 이제 액션을 만들면 되겠다.
액션 제작
나의 경우 src 폴더 안에 action 폴더를 만들고 그 안에 각각 'ActionType.js', 'index.js' 파일을 만들었다.
ActionTypes.js
export const INCREMENT = 'INCREMENT'
export const DECREMENT = 'DECREMENT'
export const SET_COLOR = 'SET_COLOR'
index.js
 import * as types from './ActionTypes';

export function increment() {
    return {
        type: types.INCREMENT,
    };
}

export function decrement() {
    return {
        type: types.DECREMENT,
    };
}

export function setColor(color) {
    return {
        type: types.SET_COLOR,
        color
    };
}
파일 이름을 index.js라고 지은 이유는 나중에 Counter.js에서 import를 해올때 import * as action from '../action'; 처럼 폴더 이름만 적으면 자동으로 index.js 파일을 불러오기 때문이다.
근데 굳이 이걸 이렇게 파일을 분리해야 하나 싶다. 만약 나라면 코드를 이렇게 합칠것이다.
//import * as types from './ActionTypes';

const INCREMENT = 'INCREMENT'
const DECREMENT = 'DECREMENT'
const SET_COLOR = 'SET_COLOR'

export function increment() {
    return {
        type: INCREMENT,
    };
}

export function decrement() {
    return {
        type: DECREMENT,
    };
}

export function setColor(color) {
    return {
        type: SET_COLOR,
        color
    };
}
아무튼 액션 제작은 이게 끝이다.
굳이 코드를 두번 쳐야하냐고 할수도 있지만 enum처럼 사용하기 위해 이렇게 만든것이라고 보이기때문에 그렇게 나쁘지는 않아보인다.
그다음은 Reducer 제작을 하면 된다.
Reducer 제작
나의 경우 src 폴더 안에 Reducer 폴더를 만들고 그 안에 각각 'counter.js', 'index.js', 'ui.js' 파일을 만들었다.
counter.js
import * as types from '../action/ActionTypes';

const init = {
    number: 0,
};

export default function counter(state = init, action) {
    switch (action.type) {
        case types.INCREMENT: {
            return { ...state, number: state.number + 1 };
        }

        case types.DECREMENT: {
            return { ...state, number: state.number - 1 };
        }

        default: {
            return state;
        }
    }
}
ui.js
import * as types from '../action/ActionTypes';

const init = {
    color: [200,200,200],
};

export default function ui(state = init, action) {
    if (action.type === types.SET_COLOR) {
        return {
            color: action.color,
        };
    } else {
        return state;
    }
}
index.js
import { combineReducers } from 'redux';
import counter from './counter';
import ui from './ui';

const reducers = combineReducers({
    counter,
    ui,
});

export default reducers;
리듀서에는 초기값이 정의되고 반환할 객체를 정의하고 있다.
여기서 주의할점은 데이터를 직접 수정하면 안되고, 스프레드 연산자로 데이터를 수정해야 한다.
combineReducers 함수는 각 리듀서들을 합쳐주는 역할을 한다. (루트 리듀서)
이것이 필요한 이유는 리액트에 단 하나의 store만을 생성하길 권장하기 때문이다. 필요하다면 다수의 store를 만들 수 있지만 앱이 상당히 복잡해지는 큰 단점이 존재한다.
리덕스 - 컴포넌트 연결
리덕스와 컴포넌트를 연결하는 방법은 세부적으로 단계가 있다.
- 스토어 생성 및 적용
- mapStateToProps 함수 생성
- mapDispatchToProps 함수 생성
- connect 함수 export 하기
src/index.js 에서 스토어 생성 및 적용을 한다.
index.js
import React from 'react';
import ReactDOM from 'react-dom';
import './index.css';
import App from './App';
import * as serviceWorker from './serviceWorker';

import { createStore } from 'redux';
import reducer from './reducer';
import { Provider } from 'react-redux';

const store = createStore(reducer, window.__REDUX_DEVTOOLS_EXTENSION__ && window.__REDUX_DEVTOOLS_EXTENSION__());

ReactDOM.render(
    <Provider store={store}>
        <App />
    </Provider>,
    document.getElementById('root')
);

// If you want your app to work offline and load faster, you can change
// unregister() to register() below. Note this comes with some pitfalls.
// Learn more about service workers: https://bit.ly/CRA-PWA
serviceWorker.unregister();
코드를 하나하나 보자.
import { createStore } from 'redux';
import reducer from './reducer';
import { Provider } from 'react-redux'
스토어를 사용하기 위해 리덕스 패키지에서 createStore 함수를,
우리가 combineReducers으로 합친 리듀서들을,
리듀서와 각 컴포넌트들을 이어줄 수 있도록 Provider를 가져왔다.
그리고 이들을 이렇게 버무리면 된다.
const store = createStore(reducer, window.__REDUX_DEVTOOLS_EXTENSION__ && window.__REDUX_DEVTOOLS_EXTENSION__());

ReactDOM.render(
    <Provider store={store}>
        <App />
    </Provider>,
    document.getElementById('root')
);
createStore의 두번째 인자인 'window.__REDUX_DEVTOOLS_EXTENSION__ && window.__REDUX_DEVTOOLS_EXTENSION__()'은 크롬의 redux devTool을 사용하기 위한 인자이기에 필수 인자는 아니다.
이렇게 스토어 생성, 적용이 끝났다.
그 다음은 component폴더 안에 있는 counter.js를 수정하자
import React, { Component } from 'react';
import CounterButton from './CounterButton';
import CounterNumber from './CounterNumber';

import { connect } from 'react-redux';

import * as action from '../action';

class Counter extends Component {
    //const [number, setNumber] = useState(3);
    constructor(props) {
        super(props);

		this.setRandomColor = this.setRandomColor.bind(this)
    }

	setRandomColor() {
        const color = [
            Math.floor(Math.random() * 55 + 200),
            Math.floor(Math.random() * 55 + 200),
            Math.floor(Math.random() * 55 + 200),
        ];

		this.props.handleSetColor(color)
    }

    render() {

		const color = this.props.color;

		const style = {
			background : `rgb(${color[0]},${color[1]},${color[2]})`
		}
        return (
            <div style = {style}>
                <CounterNumber number={this.props.number} />
                <CounterButton
                    plus={this.props.handleIncrement}
                    minus={this.props.handleDecrement}
					background = {this.setRandomColor}
                />
            </div>
        );
    }
}

const mapStateToProps = (state) => {
    return {
        number: state.counter.number,
        color: state.ui.color,
    };
};

const mapDispatchToProps = (dispatch) => {
    return {
        handleIncrement: () => {
            dispatch(action.increment());
        },
        handleDecrement: () => {
            dispatch(action.decrement());
        },
        handleSetColor: (color) => {
            dispatch(action.setColor(color));
        },
    };
};

export default connect(mapStateToProps, mapDispatchToProps)(Counter);
순식간에 뭔가 많이 불어났다. 뭔가 복잡해졌다. 그래도 천천히 보면 이해가 된다
setRandomColor() {
        const color = [
            Math.floor(Math.random() * 55 + 200),
            Math.floor(Math.random() * 55 + 200),
            Math.floor(Math.random() * 55 + 200),
        ];

		this.props.handleSetColor(color)
    }
그냥 rgb 컬러를 밝은색 위주로 랜덤으로 뽑아내는 함수다. 별거 없다
render() {

		const color = this.props.color;

		const style = {
			background : `rgb(${color[0]},${color[1]},${color[2]})`
		}
        return (
            <div style = {style}>
                <CounterNumber number={this.props.number} />
                <CounterButton
                    plus={this.props.handleIncrement}
                    minus={this.props.handleDecrement}
					background = {this.setRandomColor}
                />
            </div>
        );
    }
이 코드는 나중에 다룬다.
const mapStateToProps = (state) => {
    return {
        number: state.counter.number,
        color: state.ui.color,
    };
};

const mapDispatchToProps = (dispatch) => {
    return {
        handleIncrement: () => {
            dispatch(action.increment());
        },
        handleDecrement: () => {
            dispatch(action.decrement());
        },
        handleSetColor: (color) => {
            dispatch(action.setColor(color));
        },
    };
};

export default connect(mapStateToProps, mapDispatchToProps)(Counter);
mapStateToProps는 store 안의 state값을 props로 연결해주는 함수다.
mapDispatchToProps는 각각 dispatch 할 함수를 만들고 이를 props로 연결해주는 함수다.
export default connect(mapStateToProps, mapDispatchToProps)(Counter); 를 이해해보자.
react-redux 문서에 따르면 connect 함수는 이렇게 사용하면 된다.
?는 옵셔널을 뜻하는데 '변수의 값이 null일 수 있다는 것을 표현하고, 반대로 Optional이 아니라면(non-optional) 해당 값은 null이 될 수 없다'고 이해하면 된다.
즉 모든 인자값은 null이 될 수 있고 필수값이 아니라는 이야기이다.
function connect(mapStateToProps?, mapDispatchToProps?, mergeProps?, options?)우린 이 설명에 맞게 mapStateToProps, mapDispatchToProps를 넣어주면 된다. 뒤의 두개 인자는 잘 쓰지 않는다 하여 공부조차 안했다. ㅎㅎ...
이렇게 각 컴포넌트들과 store를 연결하는 과정은 모두 끝이 났다.
그러나 글이 끝난것은 아니다. 아직 설명하지 못한것이 있다. 위에서 나중에 다루자고 한 부분이 있다.
다시한번 코드를 보자.
render() {

		const color = this.props.color;

		const style = {
			background : `rgb(${color[0]},${color[1]},${color[2]})`
		}
        return (
            <div style = {style}>
                <CounterNumber number={this.props.number} />
                <CounterButton
                    plus={this.props.handleIncrement}
                    minus={this.props.handleDecrement}
					background = {this.setRandomColor}
                />
            </div>
        );
    }
참조하는 객체, 함수들이 다 props에서 나온다.
이것이 가능한 이유는 위에서 이미 설명했다.
mapStateToProps는 store 안의 state값을 props로 연결해주는 함수다.
mapDispatchToProps는 각각 dispatch 할 함수를 만들고 이를 props로 연결해주는 함수다.
그래서 각 컴포넌트에서 props에서 접근이 가능한 것이다.
이로서 react-redux의 코드 패턴에 대해 설명을 모두 끝이 났다. 코드 패턴 자체는 생각보다 어렵고 복잡하지는 않다.
위에서 설명한것처럼 4단계밖에 없다.
- Component 제작
- Action 제작
- Reducer 제작
- 리덕스 - 컴포넌트 연결
이것뿐이다.
추후에는 이 글을 Annotated 하고, 리덕스를 좀 익숙하게 쓰게 됐을때 같은 모습을 한 Counter앱을 나만의 방식으로 만드는 과정, 실제 앱애서는 어떻게 쓸 수 있을지 지금보다 친절하게 포스팅해보겠다.
'개발' 카테고리의 다른 글
| HTML로 얼굴인식 BoundingBOX를 그려보기('브'론트) (0) | 2021.04.29 |
|---|---|
| AWS RDS MySQL 한글이 깨짐 오류(파라미터 그룹은 오류가 없을 때) (0) | 2021.02.08 |
| Firebase Realtime database를 현업에 적용시켜보니... (2) | 2019.02.23 |
| 실무를 하고나서 뻘소리 (0) | 2018.11.18 |
| (JAVA) Naver API로 가져온 JSON을 GSON으로 Parse하기 (0) | 2018.07.23 |

